Maria’s Jumper – A Knit to Fit Sweater
It all started with the idea for a sock. It was going to be a cute and simple little thing with a bit of a cable up the side, just above the ankle. I found the perfect yarn in a rich, golden yellow color and a bit of grey heathering in the wool and casted on.
But, as I knit, I began falling deeper in love with the yarn and that little cable, and I knew it had to be more than a sock that gets hidden in my shoes or under slacks.
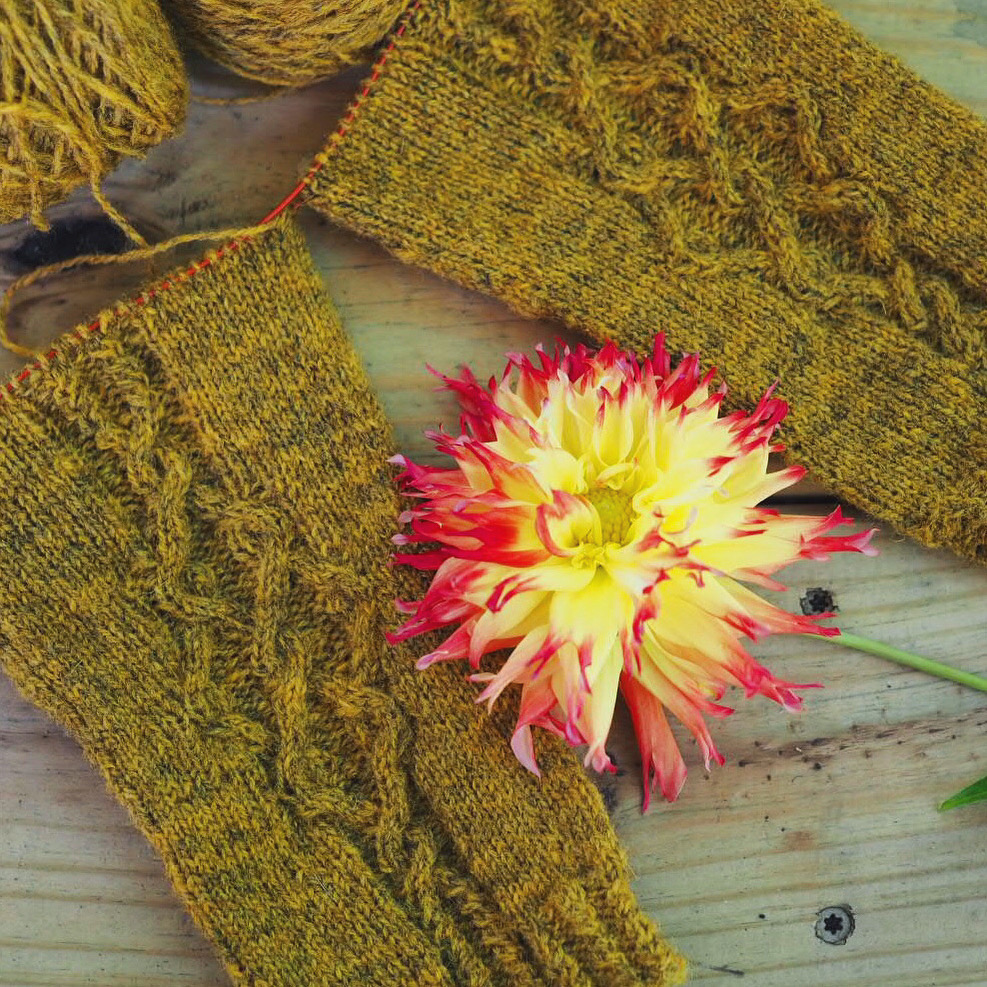
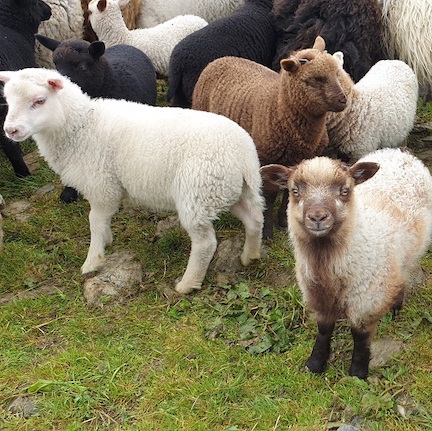
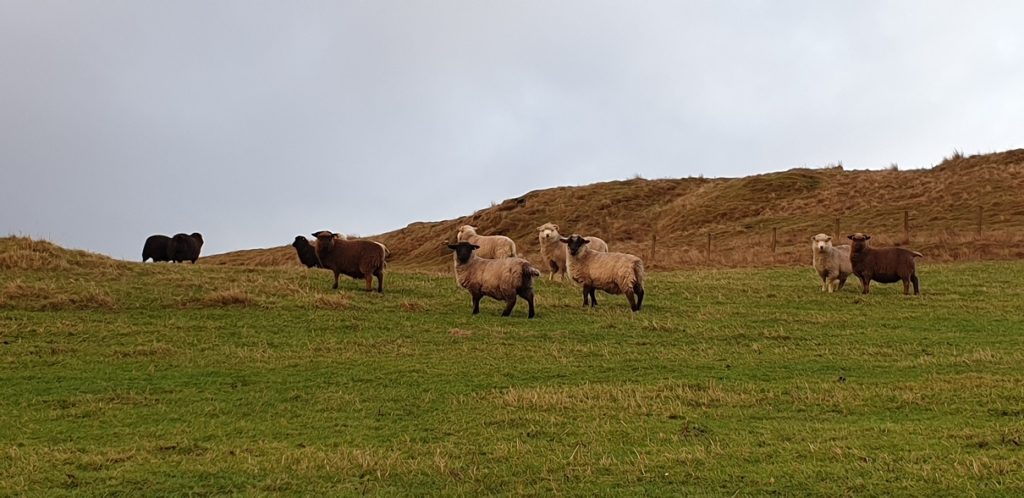
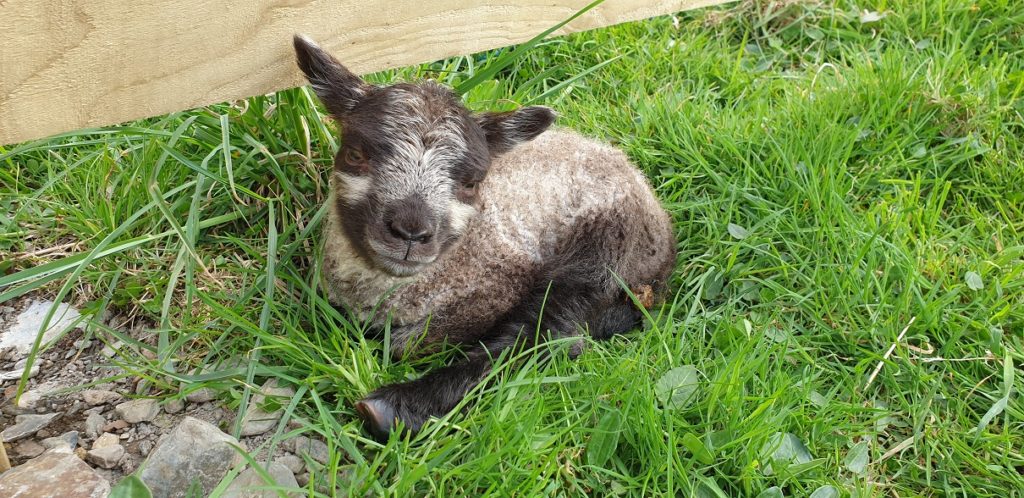
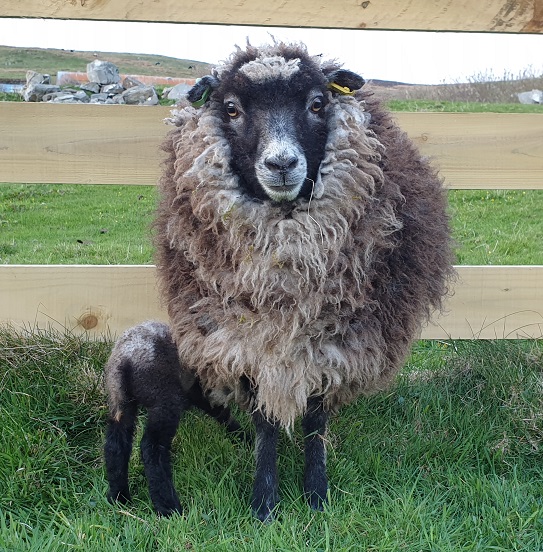
First, let me tell you a bit about this amazing yarn! I discovered Uradale Yarns at the Edinburgh Yarn Festival a few years ago. They are an ethical yarn company based in the Shetland Islands of Scotland. They shepherd Native Shetland sheep, an ancient breed whose origins date back thousands of years. The Uradale flock of 500 Shetland ewes roams 1200 acres, munching on the heather to maintain the fragile peatlands, and occasionally meandering down to the shore to nibble on seaweed when the tide is out. This use of the sheep to help maintain the delicate balance of the peatlands, the largest natural terrestrial carbon storage, creates a carbon neutral cycle! Their beautiful fleeces are grown as a wonderful by-product. Once shorn, the fleeces head to a scouring facility in England, and then back up north to the New Lanark Spinning Company where they utilizes a 130-year-old, water powered spinning mule to spin the yarn!! The whole process is certified organic from sheep to skein and 100% of it takes place within Great Britain. Yep, it’s a pretty special!
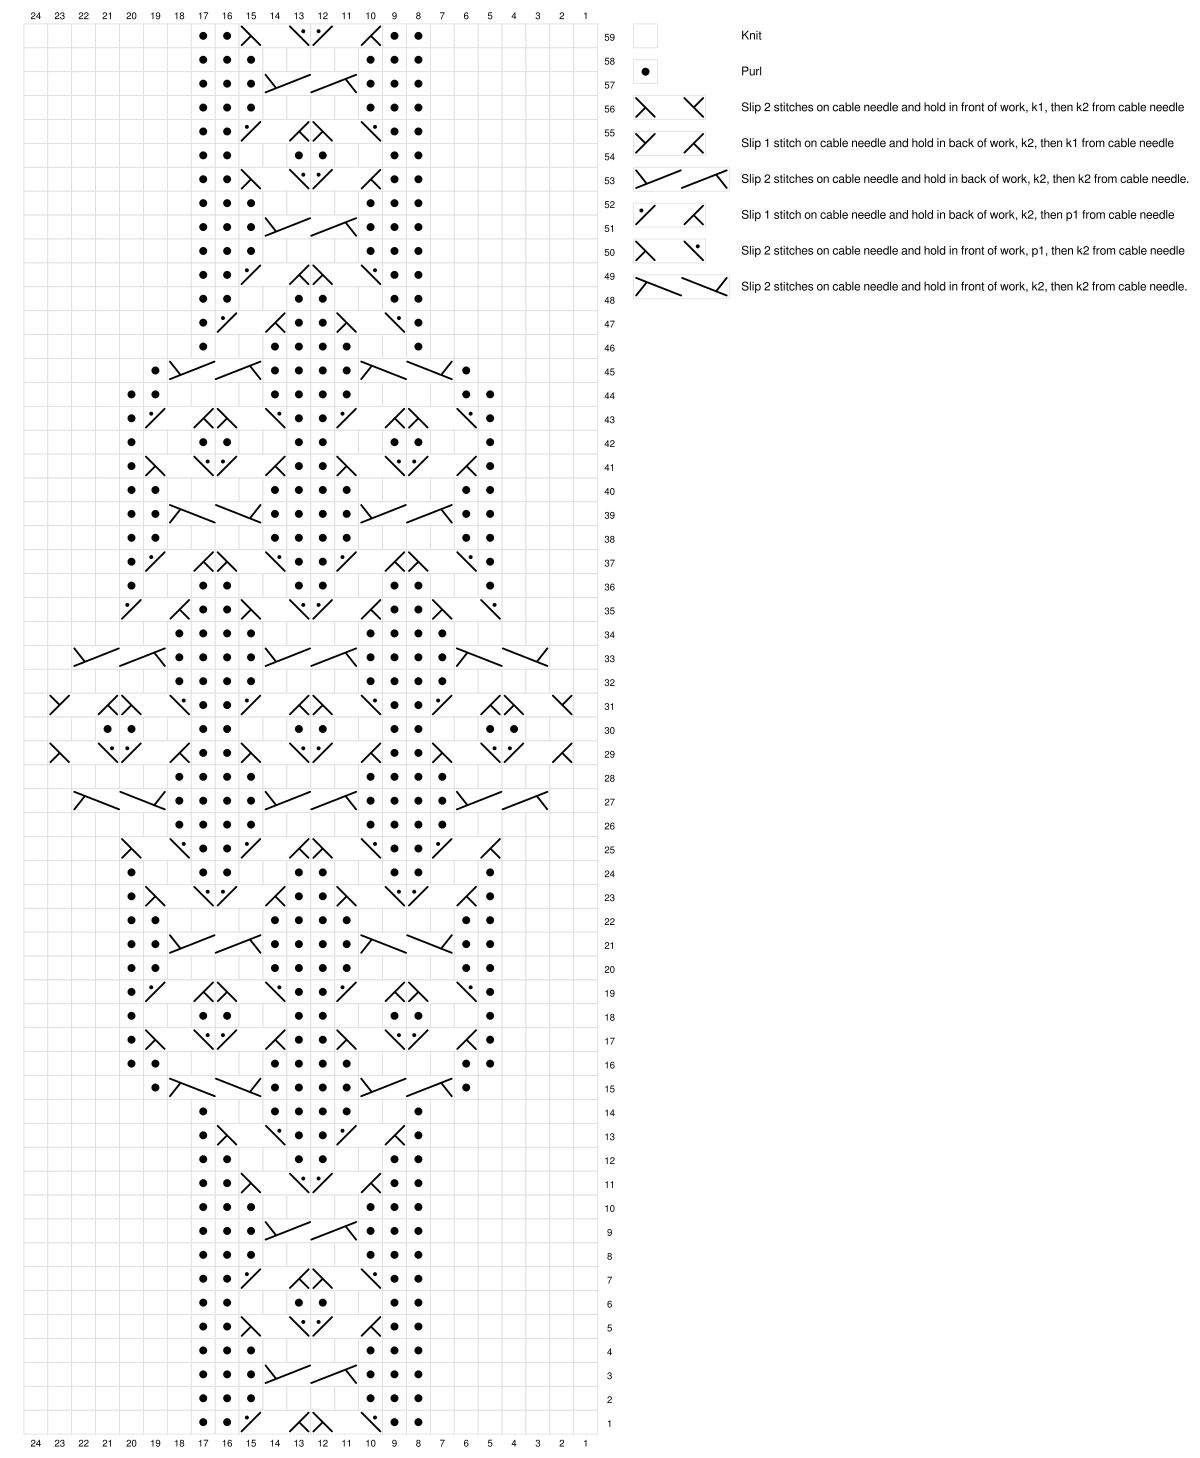
Ok, so let’s take a look at what I did with this sweet yarn. I’ve made a video of the process that I went through to create this sweater. I’m also including all of my mathematics in this post and the cable charts are at the end. If you want to ‘knit to fit’ your own sweater, it helps if you have some sweater knitting experience and an adventurous spirit!
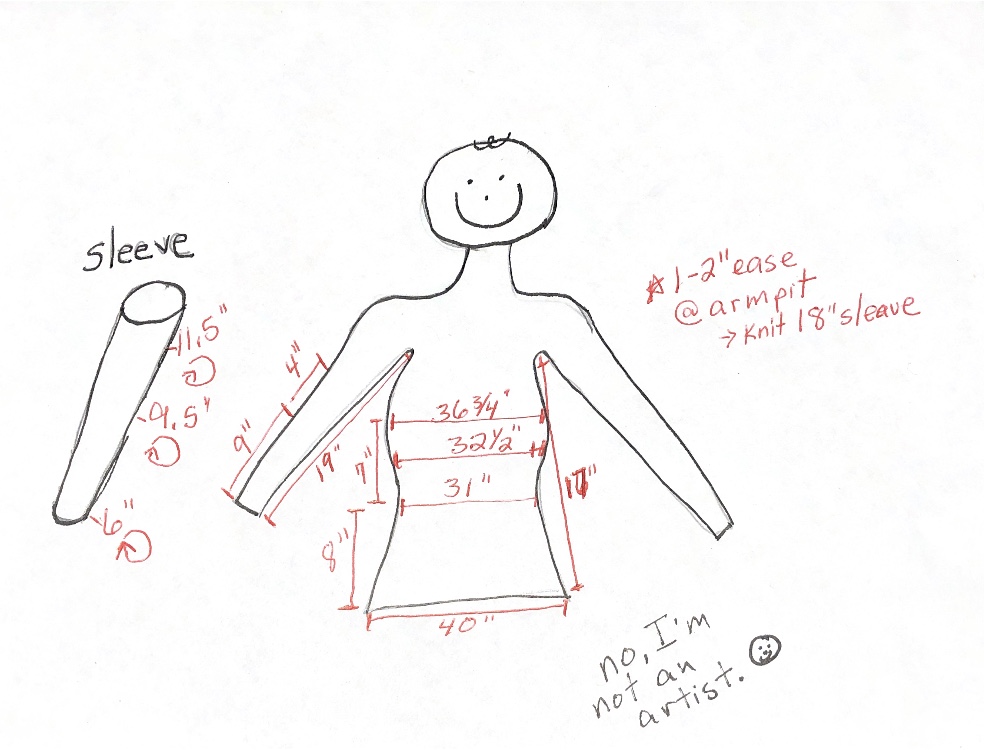
The first thing I did to get started was to take my upper body measurements… all of them! I know, it can be a mental challenge to wrap that measuring tape around our bodies and not feel judgmental, but I tried to embrace it! I only have one body and it has been with me since birth. It is beautiful and amazing in many ways. So, instead of trying to change my body to fit a sweater, I am making the sweater to fit my awesome body!
I measured the circumference around my wrist (6″), at my elbow (9.5″), and at the widest part of my upper arm (11.5″). I measured around the widest part of my hips (where I wanted the sweater to fall) (40″), around the smallest part of my waist (31″), under (32.5″) and at the widest part of my breast (36.75″). Then I measured the length of my arm from my arm pit to where I wanted the cuff of the sweater to fall (19″), from my elbow to where I wanted the cuff of the sweater to fall (9″), from my elbow up to the widest part of my upper arm (4″), from my underarm to my hips (17″), from my hips to the smallest circumference of my waist (8″), and from my waist to the widest part of my breasts (7″). With all of this, and the gauge of my yarn, I can figure out exactly how my sweater should be knit.
This measurement phase is where you can really customize your sweater. If you are ample in your backside, you can take your measurements from hip to hip in the front and then hip to hip in the back. Maybe your front side from hip to hip is only 22, but your back side is 30. This lets you know that you will want to have more of the stitches on the back half of your sweater to fit your luscious bum than you will have in the front, evening out the number of stitches in the front and back as you get to your waist. Same goes for your front side. If you have large breasts or a round belly, more stitches can be in the front half of the sweater for this section of your knit. Your gauge will tell you how many stitches per inch or row you will want in each section.
And that brings us to gauge. After taking my measurements, I needed to know my gauge. Luckily, I had that cute little sock swatch already knit. I found that I had 30 stitches and 44 rows in 4 inches (or 7.5 sts and 11 rows in one inch) on a size US1 (2.25 mm) needle.
And finally, before getting started, I needed to think about how much ease I wanted in this sweater… how loose or tight did I want it to be? In my mind, I pictured this sweater with no ease, form fitting to the body. However, I also knew that I would never wear that. I just don’t like my clothes to be tight and tend to wear things that are loose and airy more often than not. I went through my sweater stash and took out my favorites to measure the ease. They were all 8 – 9 inches more than my measurements! Wow! That’s bigger than I thought! I just didn’t think this sweater would look as good if it were super loose. So, I decided to go with a 3″ positive ease. BUT, then I thought about the fact that I would be wearing clothes under this sweater… at least a long sleeved shirt. That would create at least 2 inches of bulk under the sweater and it might start feeling snug. So, I negotiated with myself that I would use 3 inches of ease in my arms, where I didn’t want it to be super loose and the bulk of an undershirt wouldn’t be as much, and go for 6″ of ease in the body of the sweater.
OK!! So, I’ve got my measurements, my gauge, and my sweater idea! Time to cast on!!!
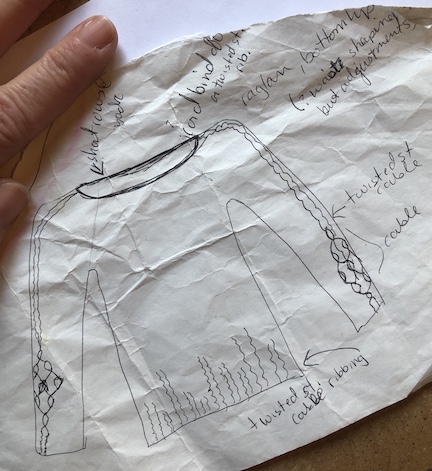
(Yes, that is the original sketch, on a balled up piece of scrap paper. I’m professional!)
I decided to start with the arms and cast on the sleeves two-at-a-time, and then do the body of the sweater bottom up! That way, I would never get stuck on Sleeve Island because I’d have both of the sleeves done before I even started the body.
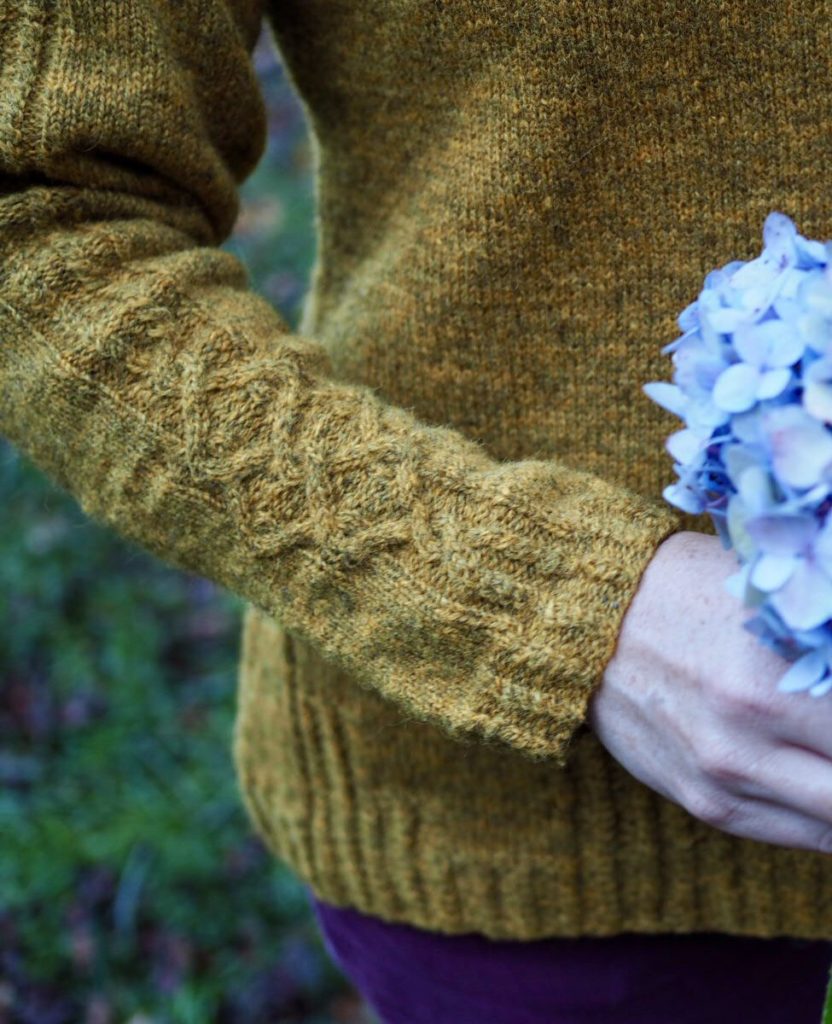
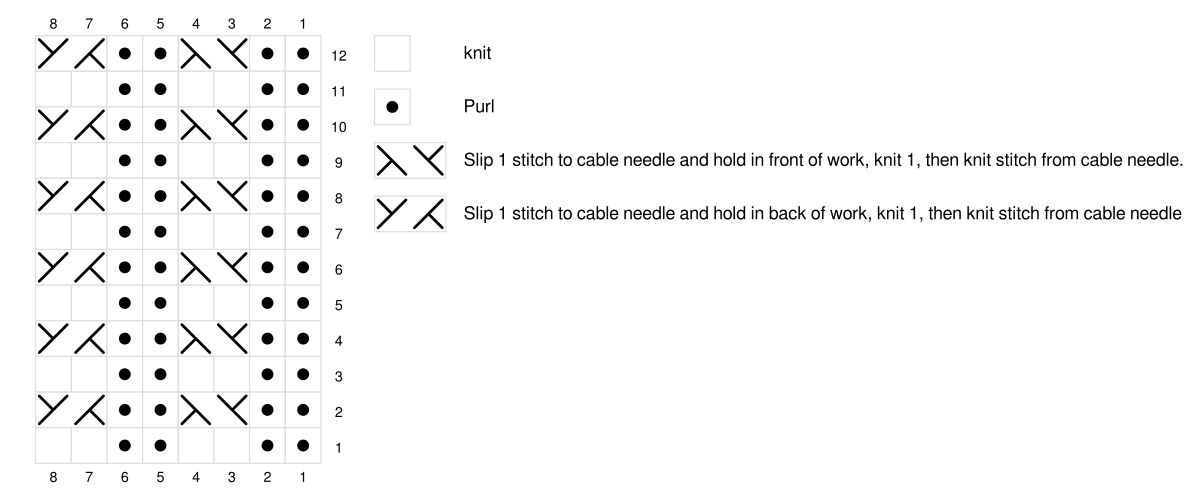
So, I have 6″ wrists and wanted 3″ of positive ease for a total of 9″. My gauge is 30 stitches in 4″ (or 7.5 stitches/inch). So I would need to cast on 9″ x 7.5 sts/in, or 67.5 sts. Well, I can’t cast on a half of a stitch, so I need to round up or down. But, I also have a stitch pattern that is an 8 stitch repeat (see ribbing cable chart below), so I wanted my cast on number to be a multiple of 8. I settled on 64 sts. The closest number to 67.5 that is also a multiple of 8. YES! I have my cast on number.
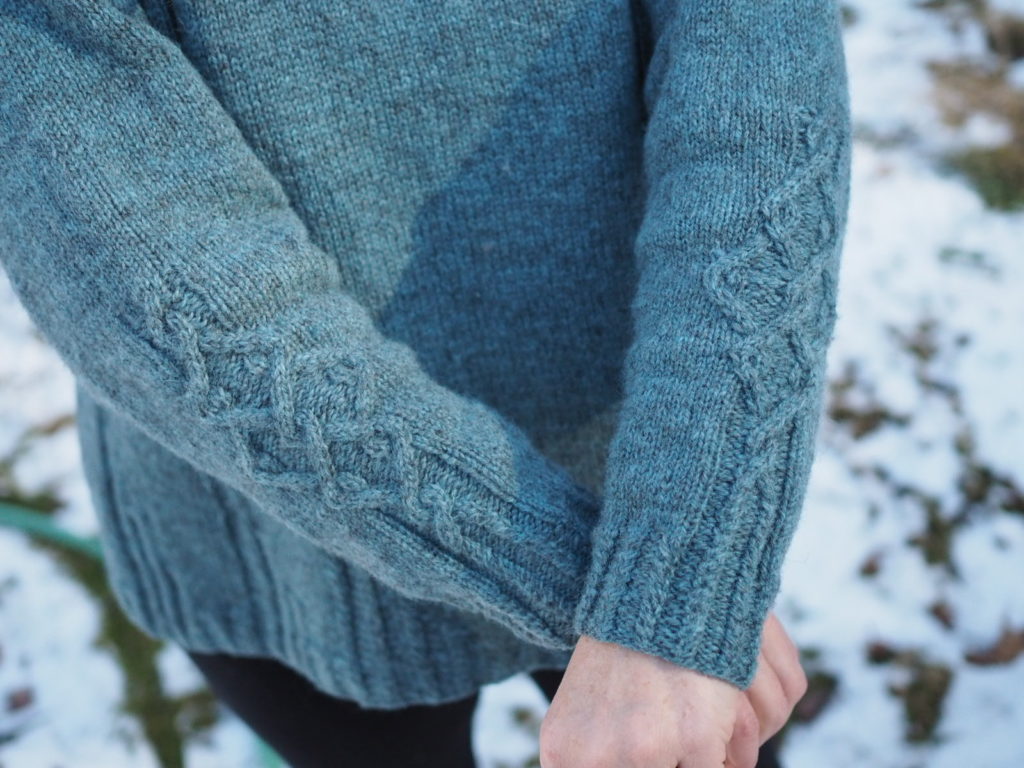
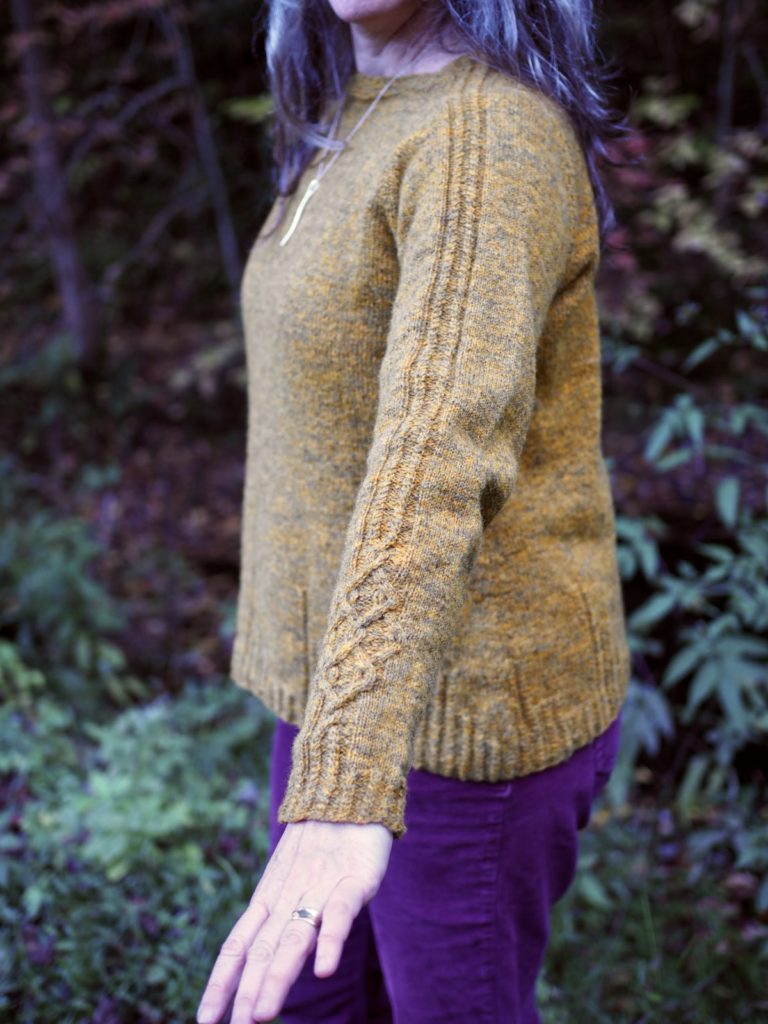
I casted on my sleeves in the round and knit the cabled ribbing for 13 rounds. Once past the ribbing, I knit a couple more inches (using the ‘sleeve cable’ and then beginning the ‘cable flourish’ charts below) until there was a change in the diameter of my arms and it was time to start the increases. Up until this point, I had been knitting the sleeves exactly the same way. But, the cable motif was to land over my wrists and outer side of my lower arm, so I now needed to distinguish the right from the left sleeve. I put both partial sleeves on my arms with the cable motif in the proper position and put a stitch marker on the sleeve at the inside of each arm, where the increases would take place. (Ok, here comes some math! Stick with me. We can do this!) I had already knit 4″ of the arms and knew that I wanted the increases to be done by the widest part of my arms, which would be when the length of the sleeve was ~14″. So, I now had 10″ over which I could make my increases (14″ – the 4″ already knit). I had 64 sts on the needles and needed to get to 106 sts (7.5 sts/inch x the 14″ circumference that I wanted at the widest part of my arm). This was an increase of 42 sts over 10″. I also knew that I had a gauge of 11 rows/inch. Eleven rows/inch x 10″ to make the increases = 121 rows in which to make the increase of 42 sts. Ok, are you still with me? Now, I planned to make my increases by knitting the standard ….M1R, K1, slip marker, K1, M1L…. that is used for sleeve increases. That meant 2 increases in each increase row. If I needed 42 total more stitches, then I need 21 total increase rows (42 sts/2 sts per increase row). Ok, so now I know that I need 21 increase rows to take place over 121 total rows, or 121 total rows divided by 21 increase rows = 5.76, or an increase row every 5 rows to have my increases completed by the time I have knit a total of 14″. Phew! We did it! Take a break and have some tea!
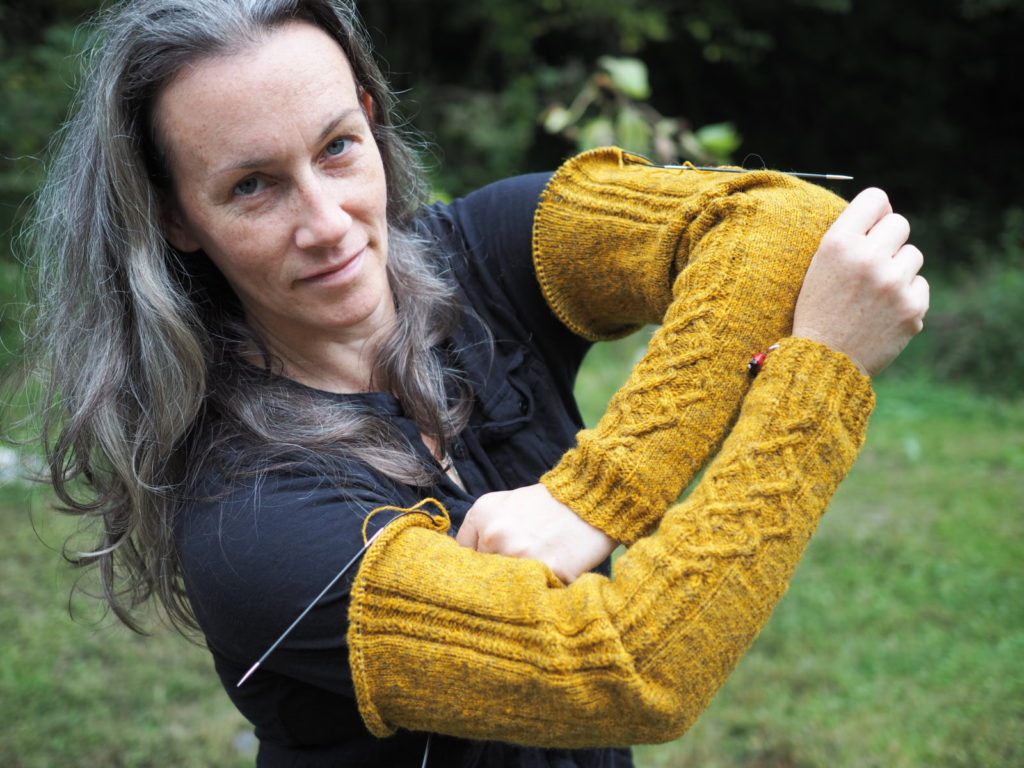
So, I kept knitting in the round, adding my increases every 5th row. Once I finished my increases, I kept knitting in the round until the total length of the sleeve measured my desired length of 18″. I put the sleeve on spare cables and prepared to move on to the body of the sweater.
Ok, so starting the body would be just like starting the arms. I wanted the same cabled ribbing design, but this time it would need to be for a 46″ circumference sweater body. To find out how many sts I would need to cast on, I needed to multiply the inches and the sts/inch, or 46″ x 7.5sts/in, which equals 345 sts. BUT, I also needed that number to be a multiple of 8, like with the sleeves. 344 is divisible by 8, so I decided to use that as my cast on number.
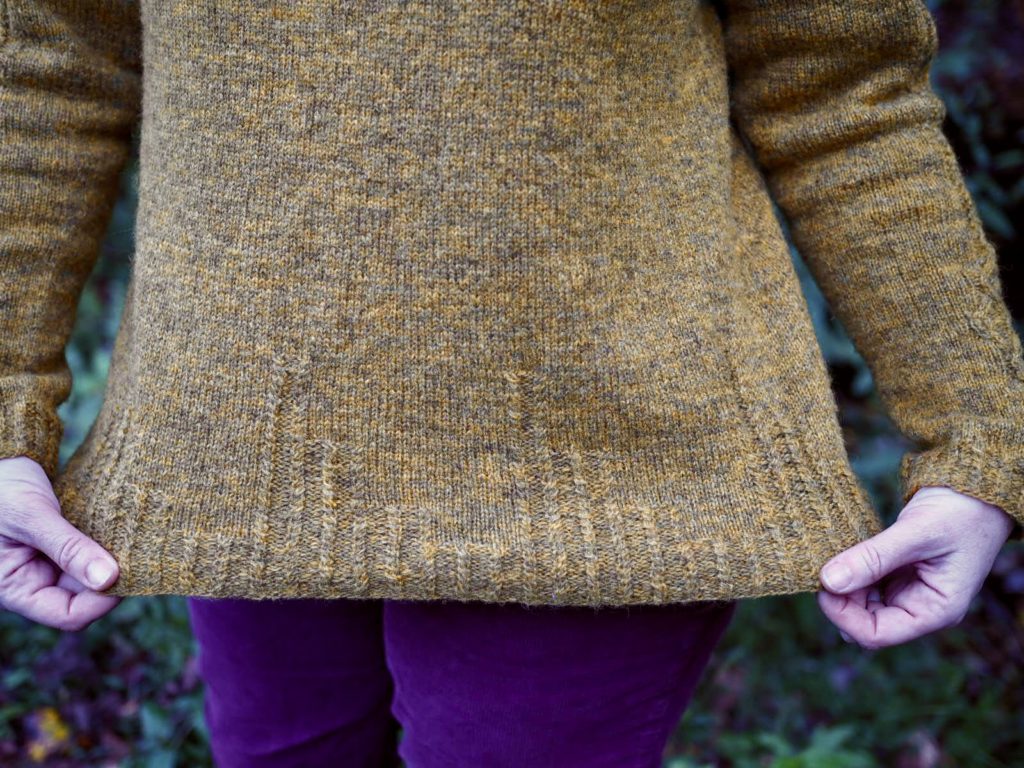
I cast on my 344 (wowza!) stitches in the round and knit the cabled ribbing for 1.5″. I decided to continue some of the cables up the body of the sweater, dropping others as I knit. While I did this I also began the decreases for a bit of waist shaping. I wanted 2 decreases at each hip (for a total of 4 decreases in each decrease row) and did the math to find that I would need to decrease by 44 sts (from 344 sts to 300 sts) or 11 decrease rows (44 decreases divided by 4 decreases in each decrease row) over the next 6.5″ or 71 rows (11 rows/in x 6.5″) to get to 40″ circumference for the waist. SO…. 71 rows divided by 11 decrease rows needed = a decrease row every 6.5 rows. So, I decided to do a decrease row every 6th row to have the decreases done by the time I knit to the waist.

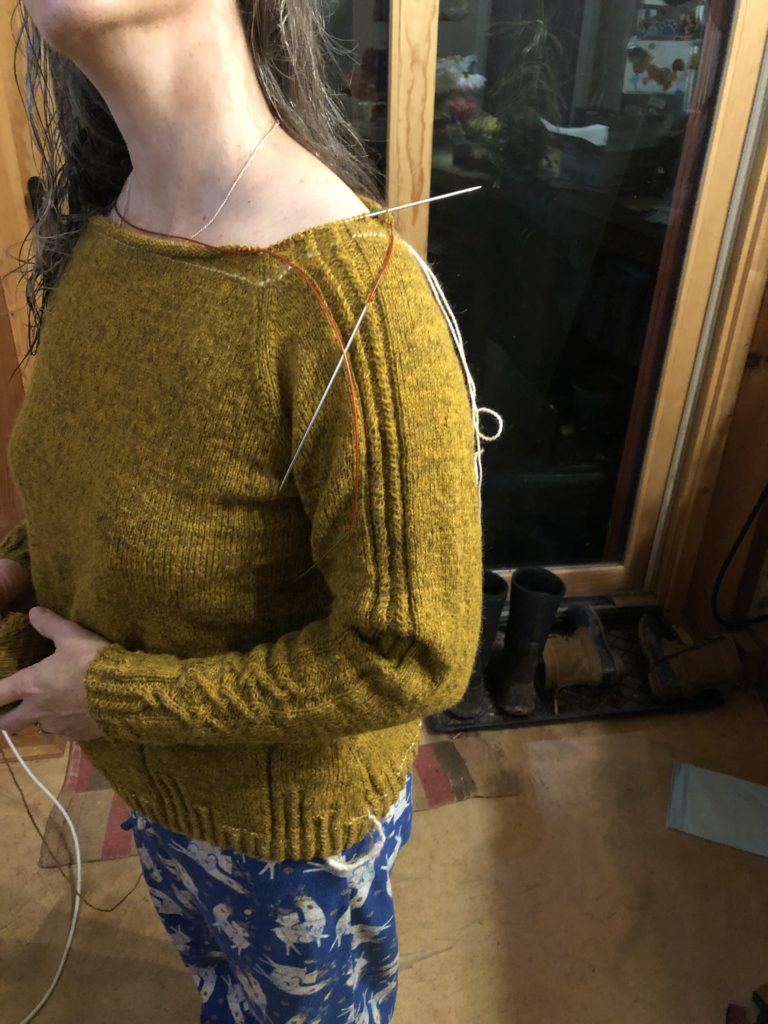
I continued knitting, dropping cables as I pleased to create a bit of a stair step design, and decreasing at the sides every 6th row to shape the waist. (You can see the white ‘life line’ that I put in just in case I didn’t like the design and wanted to rip back.)
So, now we come to the point where even if your math is perfect, human error can still mess you up. With all my calculations, I still didn’t take into account that occasionally, my gauge changes… like when I’m knitting during elections or presidential debates. So, by the time I got to the waist, I realized that I was now getting 7 sts per inch instead of 7.5. Which meant a difference of 3 MORE inches in circumference! OY! So, I had a decision to make. I could either rip back about 21,000 stitches and try to work my gauge more closely. Or, I could accept that the waist was now closer to the circumference I wanted for my chest, 43″ instead of 40″, and just knit without any increases or decreases until it was time to attach the arms. Guess what I did…. 😉 Yep, I just continued on!
I knit the body until it measured 16 inches in length. On each side, at the marker where I put the increases, I put 20 sts on a stitch holder (10 on each side of the marker). This is where I would be attaching the arms. Elizabeth Zimmerman, the great designer, has the 8% rule for how many sts to set aside for the underarm (8% of # of body sts). Eight percent of my 300 body sts would be 24. But, I previously knit a sweater that fits really well and it has the same gauge as this sweater. In that sweater, I used 18 sts for the underarms. So, I decided to pick a number between 18 and 24 and went with 20 instead. I also put 20 sts from the underarm of each sleeve on waste yarn. These two sections will be connected by Kitchener stitch later on.
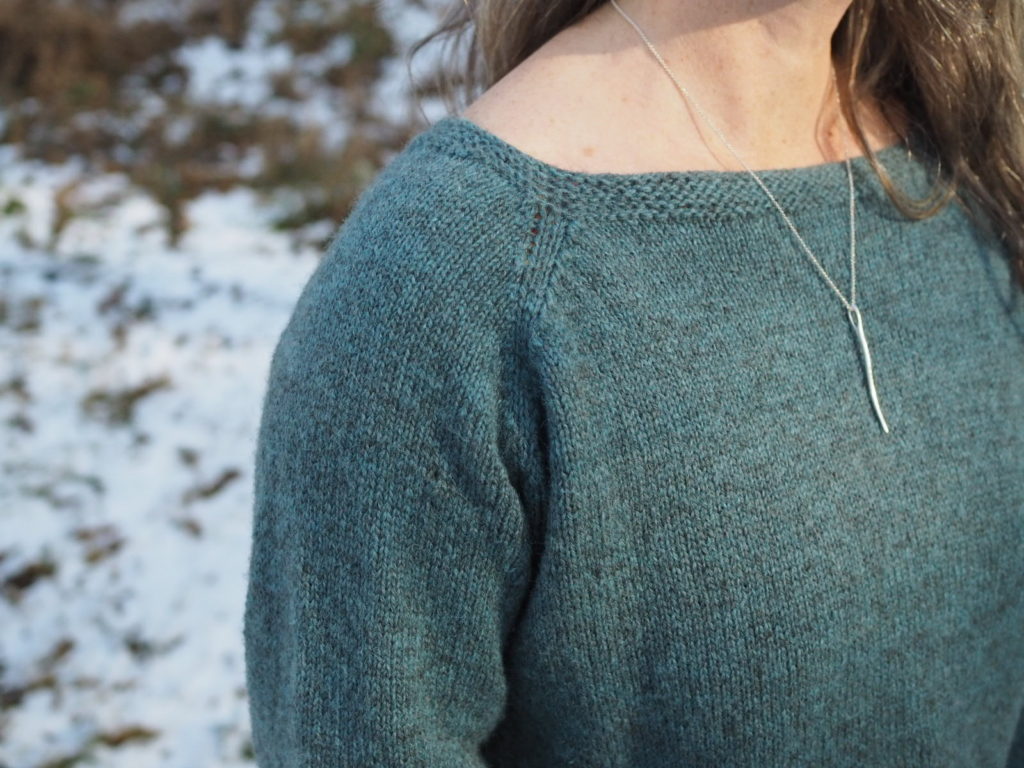
I attached my sleeves, continuing the cable pattern on the sleeve up the shoulder. I made sure to place a stitch marker at the first and ends stitch points where I connected the sleeves. These would mark where I make my decreases for the raglan shaping. I knit 3 rounds using the following decrease at the markers [K to 3 sts before the marker, ssk, K1, slip marker, K1, K2tog]. Then I continued decreasing every other round. Because my shoulders are fairly square and my chest is small, this decreasing works well for me.
Amy Herzog says the best way to make the bust larger is to make the sleeve larger and the arm hole deeper. I am small chested, so I’ve never had to experiment with adding stitches to make more room for my bust. But, you don’t want stitches pulling or puckering, so it will be a bit of mathematics and some trial and error coming up with the right amount of ease and the proper raglan decreasing in this area for you.
I planned to work the decreases every other round until the upper part of my sweater, armhole to neck measured 7 inches. That was the length I needed before beginning short rows to shape the upper back. But, as my decreases continued, the decreases on the front half of the body got closer and closer to the cable motif on the arm, as this was set more to the front of the arm than the center.
So, I put in a lifeline (in case I needed to rip back to this point) and began this decrease pattern for the right arm: k1, k2tog, k to 1 st before cable motif, kfb, knit motif, knit to 4 sts before marker sssk, k1. And this for the left arm: k1, k3tog, knit to cable motif, knit motif, M1L, k to 3 sts before marker, ssk. This added a stitch before the motif, keeping it from getting too close to the decreases, and then removed that st at the back side of the arm. I’m improvising here… I knit about an inch with this decreasing and it looked fine. So, I kept it.
After that last inch, I put the sweater on and found that it was as high as I wanted it (without the neck edging). So, it was time to do some short rows. I laid the sweater out and marked out the middle of where the sweater would hit my collar bone on each side. This is the point I wanted the first short rows to come to. I put the front, center 42 sts on a spare cable needle and worked the short rows on the rest of the sts. I worked it so that the raglan decreases happened on the knit rows and then I used a wrap & turn, purling back to the other side, and keeping the cable motif when I came to it. I completed 12 short rows, adding a bit over an inch to the upper back.
Then it was time for finishing the neck! I love this part, because it is the home stretch and I know I am so close to wearing the sweater!! I decided on a fairly simple neck finishing, purling a round, then knitting a round, while keeping the cable motif in the rounds. I didn’t want the neck stitches to flare out, so I worked decreases into every other knit round following the raglan lines. I continued the purl and knit rounds for 9 total rounds, ending on a purl round, and then bound off! I wet blocked it, pulling open the cables a bit, so they stand out.
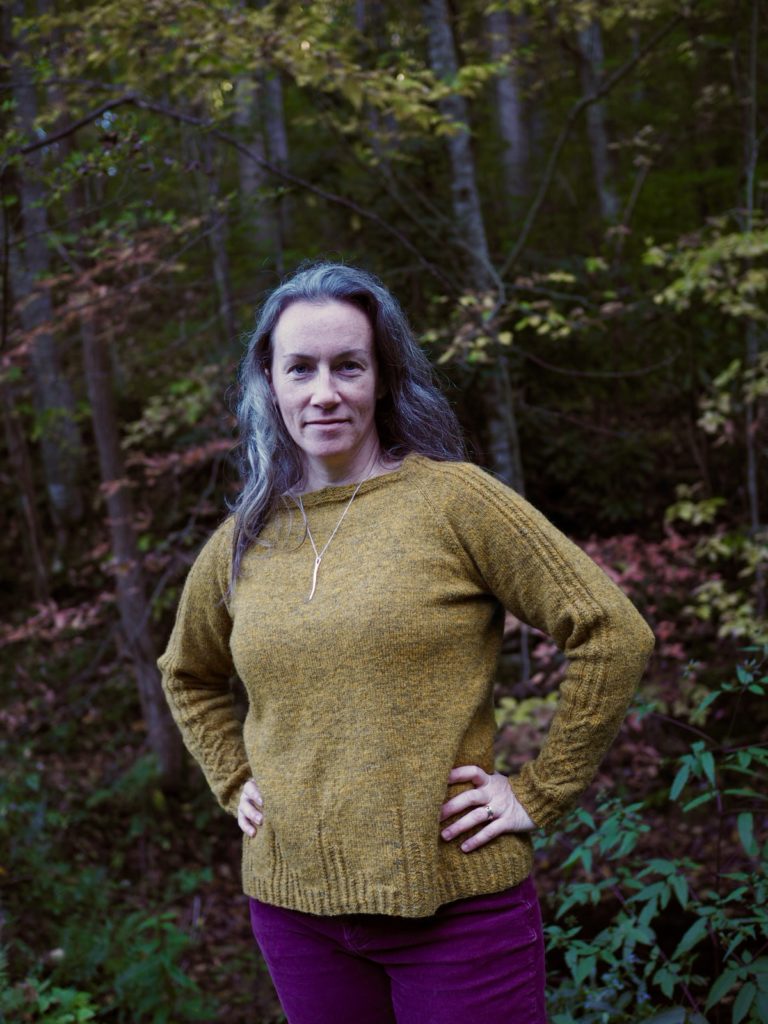
Once dried, thanks to the help of an unseasonably warm and sunny day, I immediately pulled it on. Even with all of the measuring and swatching, I always worry that the final garment won’t fit, but guess what… It Fit!! Yes!!! I am so in love! I immediately went to the Uradale website to see what colors I can get in their worsted yarns because I want to cast on another one! The only thing I would change is that I think I might stop after the cable flourish at the wrist instead of continuing it up the arm… it kind of reminds me of those 1980’s Adidas tracksuits. Haha! Still, I’m so excited for colder days! I think this will become one of my winter staples.
If you decided to tackle your own ‘knit to fit’ sweater, especially if you are including my cute little cables, please send me pictures! I would love to see your creations!

\

January 19, 2021
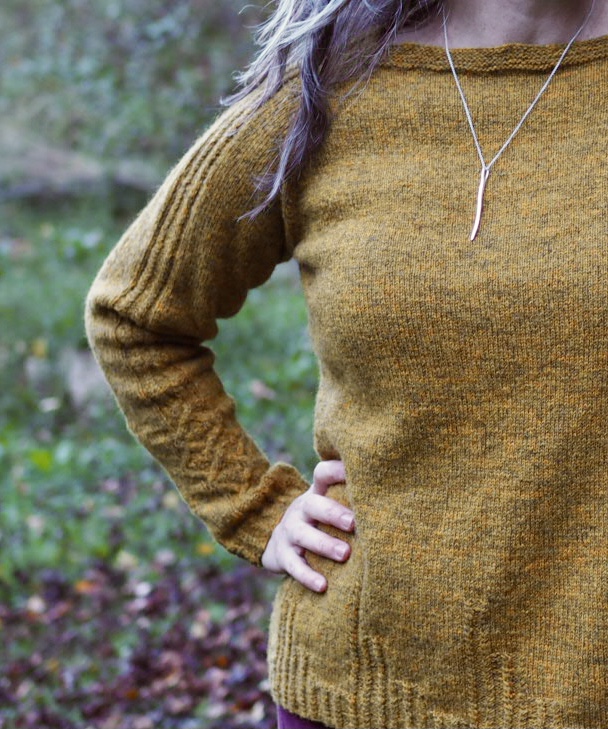
After making the sweater above, I really wanted to knit another one in a heavier weight Uradale yarn. I also wanted it to have even more positive ease. So, I cast on again, this time with the Uradale DK weight in a beautiful cloudy blue color. I made a swatch and took my measurements again. Then I cast on so that I could achieve about 9 inches of positive ease in the body of the sweater, and about 4 inches in the arms. On the arms, I included the cables at the wrist and forearm, but didn’t continue it up the arm. Once I got to the raglan decreasing, I realized that the body had too many stitches in it to use the same decreases I did for the first sweater. I needed to decrease more dramatically in the body so that the neck of the sweater wasn’t way too open. So, I decreased on the sleeves between the markers as I did above (K1, K2tog, K to 3 sts before the marker, ssk, K1). However, on the front and back body sections I did my raglan decreases like this: K1, K3tog, K to 4 sts before the marker, sssk, K1. That brought the neckline in more dramatically, to accommodate for the extra stitches (ease) that I had in the body of the sweater.
In looking at the pictures, I think I could have decreased in the bust area more. That would have eliminated the need to change the raglan decreases and gotten rid of the extra bit of fabric in the bust/underarm area. But, it’s more of how it looks vs. how it feels. I don’t mind the extra fabric in the bust area, because it allows me the freedom to wear lots of layers underneath on cold days like we have been having recently. Overall, I’m thrilled with the final garment. It’s warm and cozy, and it fits just as I had hoped.